
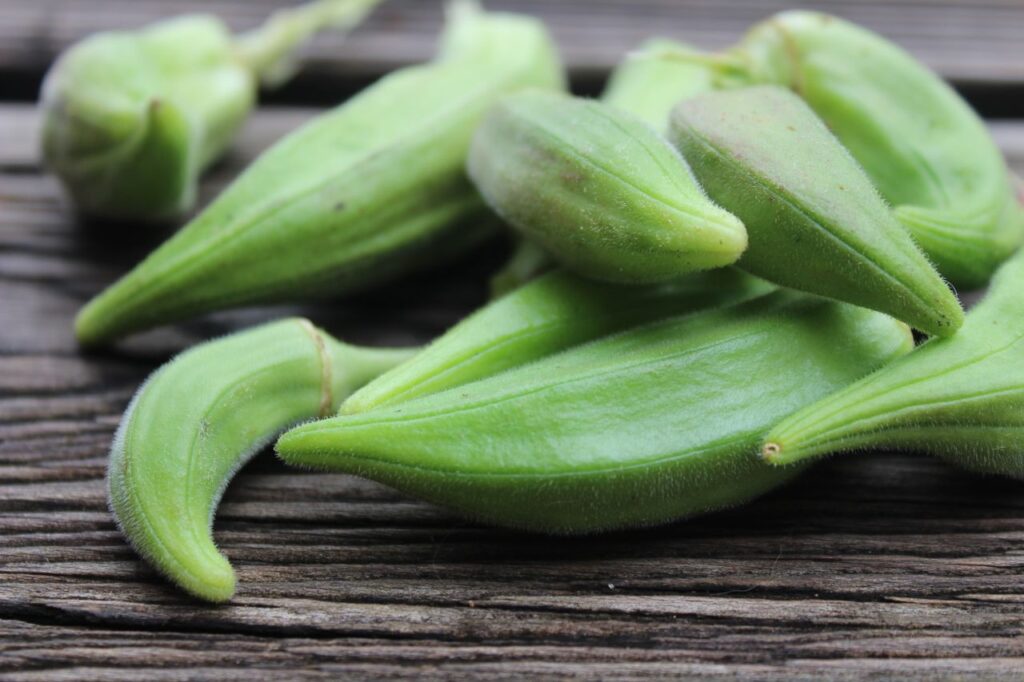
To get more okra from each plant, focus on keeping the plant actively growing, flowering, and producing tender pods for as long as possible.
Okra, commonly called ladies’ finger in Malaysia, naturally suits warm conditions and can be highly productive in a sunny home garden. But a plant that is crowded, repeatedly allowed to dry out, overfed with nitrogen, or left with mature pods for too long may produce much less than its potential.
One of the most important habits is surprisingly simple:
harvest the pods frequently while they are still young.
Then support that continuous production with enough sunlight, water, root space, balanced nutrition, and good plant health.
Give Okra Plenty of Sunlight
Okra is a sun-loving crop.
A plant may survive in partial shade, but good fruit production usually requires strong light.
In Malaysian homes, this can become a problem when okra is planted:
beside a shaded wall,
under a roof overhang,
behind larger fruit trees,
or where climbing vines eventually block the sun.
For better production, place okra where it receives several hours of strong direct sunlight.
The more energy the leaves can produce through photosynthesis, the more resources the plant has available for flowering and pod development.
Avoid Crowding the Plants
Okra starts fairly small but can eventually become tall and broad.
If several plants are packed too closely together, they compete for:
sunlight,
water,
nutrients,
and root space.
Dense planting also reduces airflow.
As a practical starting point, many home gardeners can space okra around 30 to 45 cm apart, with more room for vigorous varieties.
Exact spacing depends on the variety and growing system.
Do not squeeze extra plants into every empty gap just because young seedlings look small.
Fewer well-grown plants can sometimes produce more usable okra than a crowded bed full of struggling plants.
Give the Roots Enough Space
Okra develops a substantial root system.
For container growing, use a suitably large, deep container rather than leaving the plant permanently in a small nursery pot.
Restricted roots can make the plant:
dry out quickly,
grow more slowly,
and produce fewer pods.
If growing several okra plants, individual pots or a sufficiently large raised bed generally give the roots more room than a crowded shallow container.
Good drainage is essential.
The container should hold useful moisture while allowing excess rainwater to escape.
Keep Watering Reasonably Consistent
Established okra can tolerate some dry conditions, but repeated drought stress can reduce growth and pod production.
A plant that regularly wilts severely may:
drop flowers,
slow pod development,
and stop producing vigorously.
During hot Malaysian weather, container-grown okra can dry surprisingly quickly.
Check the soil rather than watering only according to a fixed schedule.
When watering, moisten the root zone properly instead of giving a tiny splash at the surface.
Do Not Keep the Roots Permanently Wet
Okra likes warmth but does not benefit from waterlogged soil.
During prolonged Malaysian rain, raised beds or pots with poor drainage may remain saturated.
Roots require oxygen.
If the soil stays wet for too long, plant performance may decline.
Look for problems such as:
persistent yellowing,
slow growth,
or continuously soggy soil.
If those appear, improve drainage before increasing fertiliser.
Mulch Can Help Stabilise Moisture
A suitable mulch layer can reduce rapid moisture loss during hot periods.
It may also help:
suppress weeds,
protect the soil surface,
and reduce moisture swings.
Apply mulch around the plant without piling it tightly against the stem.
During very wet periods, check that an excessively thick mulch layer is not keeping the root zone unnecessarily wet.
Feed for Production, Not Just Leaves
Okra needs nutrients, but excessive fertiliser does not automatically mean more pods.
Too much nitrogen can encourage:
large leaves,
rapid vegetative growth,
and tall plants
without a matching increase in pod production.
Use an appropriate balanced fertiliser programme and follow labelled application rates.
Once the plant begins flowering and producing pods, avoid repeatedly applying high-nitrogen fertiliser simply because you want faster growth.
Compost Can Support the Soil
Mature compost can help improve soil structure and organic matter.
Before planting, incorporate a sensible amount into the bed or potting mix if the soil needs improvement.
For established plants, the exact amount of additional compost depends on the existing soil and growing system.
Do not bury the roots under large amounts of unfinished compost or fresh organic waste.
Healthy soil should support both water retention and drainage.
Harvest Young Pods Frequently
This is one of the most important steps for productive okra.
Okra pods grow quickly.
Once flowering begins, inspect the plant often.
Depending on variety and weather, pods may move from tender to oversized surprisingly fast.
Harvest them while they are still young and tender rather than waiting for maximum size.
Allowing pods to remain on the plant until they become large and mature directs the plant’s resources toward seed development.
Frequent harvesting helps keep the plant in a productive cycle.
Do Not Let Mature Pods Hide in the Plant
One overlooked pod can become very large.
Check the whole plant carefully, including pods hidden behind leaves.
During peak production, you may need to inspect okra every day or every couple of days.
If you find an oversized, tough pod that you do not intend to save for seed, removing it prevents the plant from continuing to invest resources in its development.
Learn the Right Harvest Size for Your Variety
There is no single perfect length for every okra variety.
Some remain tender when relatively long.
Others become fibrous quickly.
Learn from your own crop.
Harvest a few pods at different sizes and compare:
texture,
tenderness,
and cooking quality.
Once you identify the ideal stage, use that as your regular harvest target.
Use Clean Tools
Okra stems can be fibrous.
Use clean scissors or pruning shears where practical rather than repeatedly twisting pods until branches are damaged.
Cut the short pod stem cleanly.
This reduces accidental damage to:
branches,
flowers,
and nearby developing pods.
Okra plants may also have irritating hairs on stems and leaves, so gloves can be useful for sensitive gardeners.
Harvesting Regularly Can Extend Production
A productive okra plant may continue forming flowers and pods for a considerable period.
Regular harvesting keeps the crop useful.
Think of okra as a repeating harvest plant rather than a vegetable you harvest once.
Your routine becomes:
flower,
pod,
harvest,
new flower,
new pod.
As long as the plant remains healthy and continues producing worthwhile new growth, keep harvesting.
Support the Plant if Necessary
Some okra plants can become tall, especially in fertile soil.
Strong winds and Malaysian thunderstorms may cause tall plants to lean or break.
If necessary, provide a sturdy stake.
Tie the plant loosely so the stem can still move slightly.
Do not tie so tightly that the material cuts into the expanding stem.
Keeping the plant upright helps protect productive branches.
Remove Problem Leaves Selectively
Old lower leaves may eventually yellow or become damaged.
You can remove leaves that are:
badly diseased,
heavily pest-damaged,
or completely declining.
But do not strip the plant unnecessarily.
Healthy leaves produce the energy required for continued flowering and pod production.
A heavily defoliated okra plant may have fewer resources available for future harvests.
Should You Prune or Top Okra?
You may see advice recommending that every okra plant be topped to force branching.
This should not be treated as a universal rule.
Some okra plants naturally develop side branches.
Others grow mainly from a strong central stem.
Cutting the growing tip may encourage branching in some situations, but it also temporarily removes active growth and can reduce production if done at the wrong time.
For most home gardeners, good sunlight, spacing, watering, feeding, and regular harvesting are more reliable ways to improve yield than aggressive pruning.
If you experiment with topping, try it on only some plants and compare the results.
More Branches Can Mean More Flowering Sites
When okra naturally produces healthy side branches, those branches may develop additional flowers and pods.
This is useful.
But do not confuse productive branching with an overcrowded mass of weak shoots.
Strong branches with good sunlight are valuable.
Dense shaded growth is less useful.
Give the plant enough room to develop naturally.
Watch for Pest Damage
Okra can attract pests including:
aphids,
whiteflies,
mites,
caterpillars,
and other insects depending on the garden.
Inspect:
growing tips,
young leaves,
flowers,
and leaf undersides.
A small amount of pest activity does not always require treatment.
But severe infestations can reduce vigour and therefore production.
Identify the pest before using any treatment.
If pesticides are needed, use products appropriate for edible crops and follow the label carefully, including harvest intervals and pollinator precautions.
Watch the Flowers Too
Okra flowers are large and attractive, but each one is relatively short-lived.
After successful pollination, the pod begins developing behind the flower.
If many flowers repeatedly fall without forming pods, check:
heat stress,
water stress,
poor plant health,
and pest damage.
Okra flowers contain both male and female reproductive structures and are generally capable of self-pollination, although insects can help.
Do Not Expect Every Flower to Become a Pod
Even healthy plants may lose some flowers.
That does not necessarily indicate a problem.
Look at overall production.
If the plant is regularly producing tender pods, occasional flower loss is normal.
Your goal is consistent harvest, not 100 percent fruit set.
Keep Weeds Under Control
Large weeds compete with okra for:
water,
nutrients,
and light.
Remove weeds while they are small.
A clean growing area also makes it easier to inspect the lower stem and harvest hidden pods.
Mulching can reduce the amount of weed growth between plants.
Track How Much Each Plant Produces
If you want to know whether your growing method is actually working, weigh the harvest.
For example:
Plant A — 320 g this week
Plant B — 450 g
Plant C — 180 g
Over time, you may discover that:
one variety performs better,
larger containers give higher yields,
one garden location receives better sunlight,
or certain plants decline much earlier than others.
Harvest tracking turns guesswork into useful information.
Total Harvest Matters More Than One Giant Pod
Do not judge an okra plant by the size of its largest pod.
The better measure is how much tender, usable okra the plant produces over its productive life.
A plant giving:
many tender medium-sized pods
may be much more useful than one producing occasional giant but fibrous pods.
Harvest quality matters.
Start Replacement Plants Before Old Ones Finish
Eventually, even a productive okra plant will slow down.
You may notice:
longer gaps between flowers,
fewer pods,
weak side shoots,
increasing woodiness,
or declining new growth.
Do not necessarily wait until the plant dies.
If you rely on okra regularly, start a younger batch while the old plants are still producing.
This creates overlap and helps maintain continuous harvests.
Know When an Old Okra Plant Is No Longer Worth Keeping
Older okra can become very tall and woody.
If the plant occupies substantial space but produces only occasional poor-quality pods, it may have reached the end of its useful productive life.
At that point, removing it and starting a younger crop may produce more food from the same space.
Keeping an old plant alive is not always the same thing as keeping the garden productive.
A Simple Okra Yield Checklist
To get more okra from each plant:
1. Give it strong sunlight.
2. Avoid overcrowding.
3. Provide enough root space.
4. Keep moisture reasonably consistent.
5. Maintain good drainage.
6. Feed appropriately without excessive nitrogen.
7. Harvest pods young and frequently.
8. Remove oversized pods unless you are saving seed.
9. Protect productive growth from serious pests and damage.
10. Replace ageing plants once production clearly declines.
These fundamentals matter more than any single gardening trick.
Build a Harvest Routine
Once okra starts producing, consistency becomes your biggest advantage.
Walk through the garden regularly.
Check for new pods.
Harvest the tender ones.
Inspect the leaves.
Check soil moisture.
Look for new flowers.
This takes only a few minutes, but it prevents pods from becoming overmature and allows you to spot problems early.
At the end of the day, getting more okra from each plant is about keeping the plant in a strong, continuous production cycle. Give it plenty of sun, enough root space, consistent moisture, good drainage, balanced nutrition, and room to grow. Most importantly, harvest tender pods frequently instead of leaving them to mature on the plant. In Malaysia’s warm climate, a healthy okra plant can produce repeatedly — and a simple habit of checking and harvesting often can make a surprisingly big difference to the total amount of ladies’ finger you bring into the kitchen.
Growing okra at home and trying to increase your harvest? Tag @projectharvest.my on Instagram and share a photo of your plant, your latest batch of pods, or even your weekly harvest weight. We would love to see how much Malaysian home gardeners can get from a single well-managed okra plant — and which varieties keep producing the longest.