
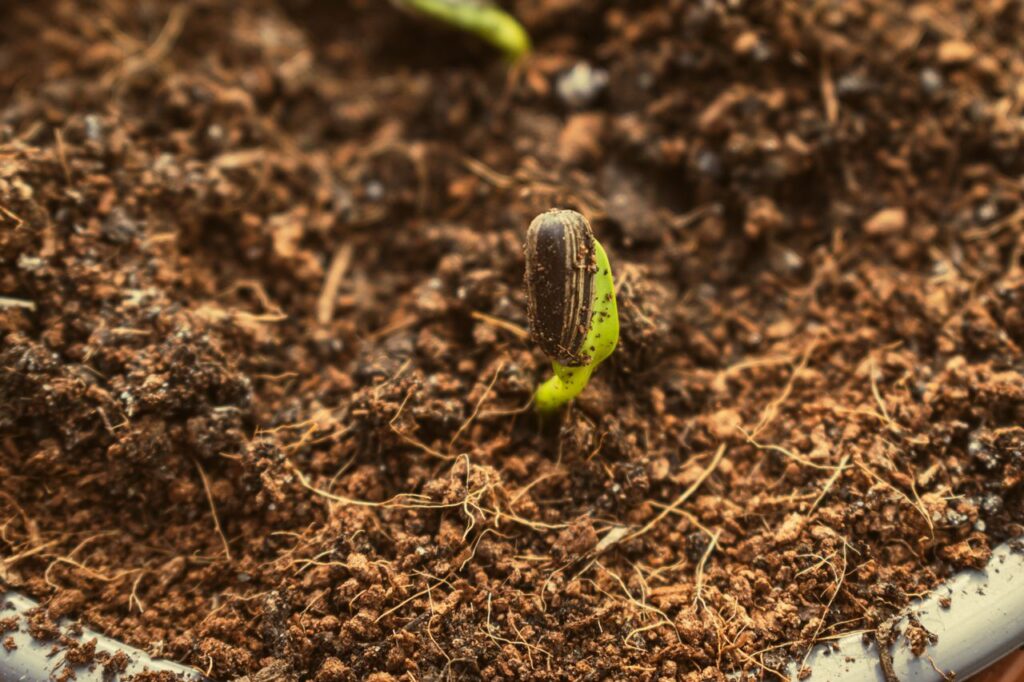
Fresh seed does not guarantee successful germination.
A newly purchased packet of chilli, tomato, basil, okra, or vegetable seed can still produce disappointing results if the conditions around the seed are not suitable.
For germination to happen, the seed needs the right combination of moisture, oxygen, temperature, and sometimes light or darkness.
If one of those factors is wrong, a perfectly viable seed may simply sit in the soil, rot, or begin germinating and then fail before reaching the surface.
Understanding which condition went wrong is much more useful than immediately blaming the seed packet.
Fresh Does Not Always Mean Viable
A seed packet may be newly purchased, but that does not necessarily mean every seed inside is capable of germinating.
Seeds are living biological material.
Some naturally fail.
Even good-quality commercial packets rarely guarantee 100 percent germination.
Seeds may also have been exposed to unsuitable heat or humidity during transport or storage before reaching you.
This matters in Malaysia because prolonged exposure to warm, humid conditions can shorten the storage life of many seeds.
So “freshly bought” and “freshly harvested” are not always the same thing as “high viability.”
The Growing Mix May Be Too Dry
Seeds must absorb water before germination can begin.
This first stage is called imbibition, which simply means the seed takes up moisture and begins reactivating its internal processes.
If the growing medium dries out completely during this stage, germination can stop.
Tiny seeds are particularly vulnerable because they are planted close to the surface, where the mix dries fastest.
In Malaysian heat, a small seed tray can lose moisture surprisingly quickly.
Check the trays regularly, especially on hot or windy days.
The aim is steady moisture, not constant saturation.
Or the Mix May Be Too Wet
Too much water can be just as damaging.
Seeds also need oxygen.
If the growing medium remains completely waterlogged, air spaces fill with water and oxygen becomes limited.
Seeds may rot before germinating.
This is one of the most common mistakes among beginners because it feels logical to keep seeds “extra wet.”
Instead, aim for a mix that feels like a damp, wrung-out sponge.
Moist enough to support germination, but still loose and aerated.
Temperature May Be Wrong
Every crop has a preferred temperature range for germination.
Warm-season vegetables such as chillies, tomatoes, brinjal, cucumbers, and okra generally germinate well under warm conditions.
But warm does not mean infinitely hot.
A tray sitting under direct Malaysian afternoon sun can become much hotter than the surrounding air.
Excessive heat can damage seeds or dry the medium faster than you realise.
On the other hand, some temperate crops may germinate poorly when conditions are too warm.
This is why one seed tray may perform beautifully while another crop in the same location struggles.
Different seeds have different temperature preferences.
Planting Depth May Be Wrong
Fresh seeds can fail simply because they were buried too deeply.
A germinating seed has a limited amount of stored energy.
If a tiny seed is buried several centimetres below the surface, the young shoot may run out of energy before reaching light.
Very shallow planting can create the opposite problem.
The seed may dry out, become exposed, or wash away during watering.
A useful general rule is to plant many seeds around two to three times their own thickness, while following crop-specific packet instructions whenever available.
Some Seeds Need Light
Not every seed should be buried.
Certain species germinate better when exposed to light or only very lightly covered.
If a seed packet says:
surface sow,
do not cover,
or
light required for germination,
follow that advice.
Covering these seeds deeply can reduce germination even if the seeds are fresh.
This is one reason generic seed-starting rules do not work for every crop.
Other Seeds Prefer Darkness
The reverse can also happen.
Some seeds germinate better when covered and protected from light.
Again, seed-specific instructions matter.
The practical lesson is simple: do not assume every crop should be treated exactly the same way.
Fresh seed still needs the right biological trigger.
Some Seeds Have Natural Dormancy
Seeds do not always germinate immediately just because they are alive.
Some species have dormancy mechanisms that prevent germination until certain conditions are met.
Dormancy is nature’s way of stopping seeds from sprouting at the wrong time.
Depending on the species, a seed may require:
soaking,
scarification,
a period of cool conditions,
light exposure,
temperature changes,
or simply more time.
Most common home-garden vegetables do not require complicated treatment, but some herbs, flowers, fruit seeds, and native plants can.
Do not assume a slow-germinating seed is dead until you understand the species.
The Seed Coat May Be Too Hard
Some seeds have tough outer coats that slow water absorption.
Beans and many vegetables usually manage this naturally, but certain species germinate faster after appropriate pre-treatment.
Scarification means gently weakening the outer seed coat so moisture can enter more easily.
This might involve lightly nicking or sanding the coat, depending on the species.
Do not scarify seeds randomly.
Damaging the embryo inside can destroy the seed.
Only use this technique when it is recommended for that particular plant.
Seeds May Have Been Damaged
Seeds can look normal while being internally damaged.
Excessive heat, moisture, insects, fungal infection, or rough storage conditions can reduce viability.
Very old or poorly handled stock may have a low germination rate even if the packet itself looks new.
If you consistently get poor results from one batch but other seed packets germinate normally under the same conditions, the seed batch itself may be the problem.
Potting Mix Can Sometimes Cause Problems
Seed-starting mix should be light, fine, and well-draining.
Heavy garden soil can compact around tiny seeds.
Poorly matured compost may contain excessive salts or continue decomposing.
Very coarse potting mixes may leave large air gaps around small seeds, reducing seed-to-soil contact.
Fresh seed still needs close contact with evenly moist growing medium.
A proper seed-starting mix removes many unnecessary variables.
Fertiliser Can Be Too Strong
Fresh seeds do not need strong fertiliser to germinate.
They carry their own initial energy reserves.
Adding concentrated fertiliser to seed trays can increase dissolved salts around the seed and young roots.
This may inhibit germination or damage newly emerged seedlings.
Wait until seedlings have developed and require additional nutrition before beginning a gentle feeding programme.
More fertiliser does not produce faster germination.
The Seeds May Be Rotting Before You See Anything
Sometimes a seed does begin the germination process but dies underground.
Excess moisture, poor airflow, damaged seed coats, contaminated media, or disease-causing organisms can contribute.
If you carefully uncover a failed seed and find it soft, brown, mushy, or foul-smelling, rot is likely.
Improve drainage and moisture control before sowing the next batch.
Do not simply plant more seed into the same saturated conditions.
Watering May Have Moved the Seeds
Strong watering can wash tiny seeds deeper into the growing medium.
It can also push them into one corner of the tray or expose them completely.
Heavy tropical rain can do the same thing to directly sown beds.
Water gently after sowing.
A fine watering rose, careful misting during the earliest stage, or bottom watering can reduce disturbance.
For outdoor sowing, temporary protection from intense rain may improve germination.
Soil Crusting Can Trap Seedlings
Even if germination succeeds underground, the seedling may fail to emerge if the soil surface becomes hard.
Heavy soil can form a crust after rain or repeated watering.
Tiny seedlings may be unable to push through it.
This is another reason a loose seed-starting mix is useful.
For direct-sown beds, maintain a fine, friable surface around the seed zone rather than allowing the top layer to become compacted.
Some Seeds Simply Take Longer
Chillies can test a gardener’s patience.
Some varieties germinate quickly.
Others take much longer.
Temperature differences can stretch the process further.
Do not dig up the tray after four days simply because nothing has appeared.
Check the typical germination period for the crop.
Maintaining stable conditions for the appropriate amount of time is often all that is required.
Check Whether the Seed Is Still Alive
If you are unsure about a batch, you can perform a simple germination test.
Place several seeds between damp paper towels.
Keep them moist and in an appropriate temperature range.
Check periodically for germination.
If almost none germinate under suitable conditions, viability may be poor.
If they germinate well in the test but not in your seed tray, the problem is more likely the growing conditions.
This simple comparison can save a lot of guesswork.
Avoid Constantly Changing the Conditions
Another common mistake is trying a different solution every day.
Move the tray into full sun.
Then into shade.
Water heavily.
Let it dry.
Add fertiliser.
Cover it.
Uncover it.
Constant changes can make troubleshooting impossible.
Instead, create stable conditions:
appropriate warmth,
consistent moisture,
good drainage,
correct planting depth,
and time.
Then observe.
Germination usually responds better to stability than constant intervention.
A Simple Troubleshooting Checklist
If fresh seeds are not germinating, ask:
Is the growing mix staying evenly moist?
Is it waterlogged?
Is the temperature suitable for this crop?
Were the seeds planted at the right depth?
Does this species require light or darkness?
Could the seeds require special treatment?
Is the growing medium light and well-draining?
Has strong watering moved the seeds?
Have I waited long enough?
Are other seed batches germinating normally?
Working through those questions systematically is far more useful than immediately reseeding everything.
When Should You Give Up and Resow?
If the expected germination period has passed significantly and there are no signs of life, it may be time to resow.
Before doing so, change whatever likely caused the first failure.
If the original tray was waterlogged, improve drainage.
If seeds were buried too deep, plant the next batch shallower.
If the location was too hot, move the tray somewhere more suitable.
Repeating the same setup with another packet of seed may only produce the same result.
At the end of the day, fresh seeds still need the correct environment to germinate. Moisture, oxygen, temperature, planting depth, light, and seed condition all work together, and getting just one of them badly wrong can leave a tray looking completely empty. Instead of assuming the seeds are faulty, troubleshoot the conditions around them. Once you identify whether the problem is too much water, too little water, excessive heat, planting depth, or simply impatience, seed starting becomes much more predictable.
Have you ever opened a fresh seed packet, planted the whole tray, and ended up staring at empty soil for two weeks? Tag @projectharvest.my on Instagram and share what you planted, how long you waited, or what finally solved your germination problem. Your failed tray might actually contain the exact lesson another Malaysian gardener needs before starting their next batch.