
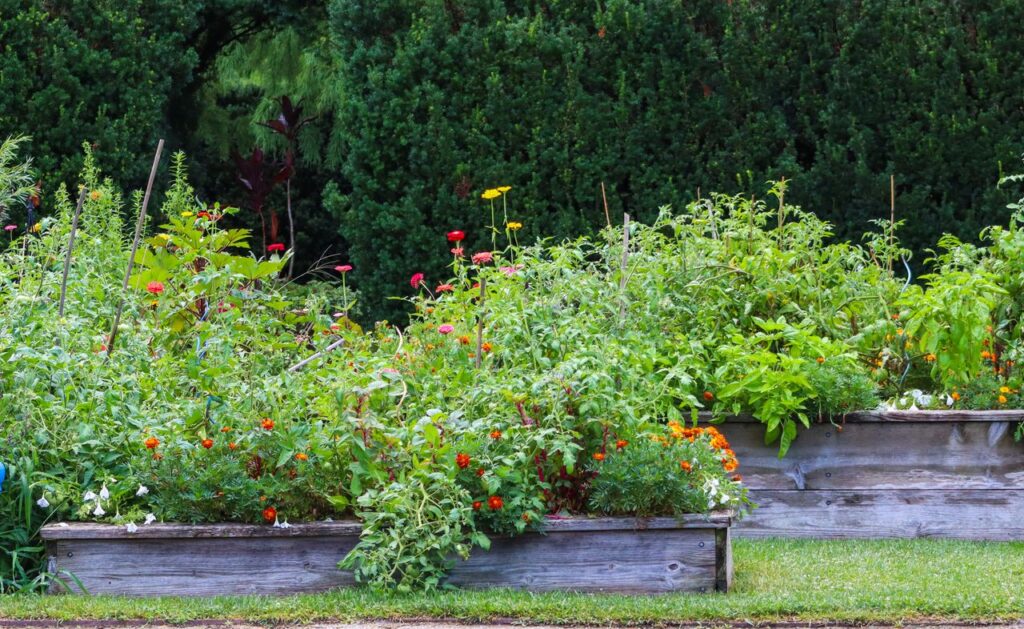
A raised bed is ready for a new crop cycle when the old plants are cleared, the soil is healthy and well drained, nutrients have been replenished where needed, and the layout has been planned for what you are about to grow.
You do not need to empty the bed and replace all the soil every time.
In most healthy home gardens, the better approach is to inspect, refresh, correct, and replant.
For Malaysian gardeners growing several crops throughout the year, this lets one raised bed stay productive across many cycles without unnecessary soil replacement.
Start with the Previous Crop
Before preparing anything, think about what just finished.
Ask:
Was the previous crop healthy?
Did it suffer from pests?
Was there any serious disease?
Did the soil stay too wet?
Did the plants look nutrient-deficient?
Was the bed overcrowded?
Did production decline normally, or did something go wrong?
The answers tell you what needs to change before the next crop goes in.
A bed that produced well may need only a light refresh.
A bed with root rot, compaction, or recurring disease needs more attention.
Remove the Old Crop Properly
Take out the main stems, root crowns, and large woody roots from the previous crop.
Fine healthy roots do not need to be removed completely.
They can break down naturally and contribute organic material to the soil.
However, remove:
rotting roots,
diseased roots,
large woody material,
and badly infested plant debris.
Healthy plant material can often be composted.
Severely diseased material should be handled more cautiously rather than automatically returned to a home compost pile.
Clear Weeds Before Replanting
A crop transition is the easiest time to remove weeds.
Once the next vegetables are established, weeding becomes harder.
Remove young weeds before they set seed.
For spreading weeds, make sure you remove enough of the roots or underground stems to prevent rapid regrowth.
Do not simply cover problem weeds with fresh compost and hope they disappear.
Check the Soil Level
Raised beds gradually settle.
Organic matter decomposes.
Soil particles move.
After several crop cycles, you may notice the bed level has dropped.
If necessary, top it up with appropriate soil or growing mix.
Do not fill the entire lost volume with unfinished compost or fresh kitchen waste.
The root zone needs stable, mature growing material.
Check Soil Structure
Take a handful of moist soil.
It should feel reasonably crumbly rather than:
hard,
sticky,
waterlogged,
or completely powdery.
If the bed has become compacted, gently loosen the upper soil with a garden fork or hand cultivator.
Avoid aggressively turning the whole bed if it is not necessary.
The goal is to create a root-friendly structure, not destroy every existing soil layer.
Avoid Working Saturated Soil
This matters especially during Malaysian rainy periods.
If the bed is waterlogged after heavy rain, wait until it drains before working it.
Digging very wet soil can smear and compact it.
You may end up making the structure worse.
The soil should be moist and workable, not muddy.
Check Drainage
A raised bed should allow excess water to escape.
Look for:
water pooling,
persistently soggy corners,
poor-smelling soil,
or areas where the previous crop’s roots rotted.
If drainage is poor, solve that before planting.
Possible causes may include:
compacted soil,
blocked drainage,
an unsuitable bed base,
or soil that holds too much water.
Do not assume adding fertiliser will fix a drainage problem.
Roots need oxygen as well as nutrients.
Add Mature Compost Where Needed
Mature compost is one of the most useful materials for preparing a bed between crop cycles.
It can help:
improve soil structure,
increase organic matter,
support water retention,
and contribute nutrients.
For an established raised bed, a surface layer of roughly 2 to 5 cm of mature compost can be a practical starting point depending on the existing soil and crop needs.
You can lightly incorporate it into the upper layer or leave it nearer the surface depending on your system.
More is not automatically better.
Make Sure the Compost Is Finished
Do not plant seedlings into large amounts of hot, unfinished compost.
Finished compost should generally be:
dark,
crumbly,
earthy-smelling,
and no longer heating strongly.
Most original materials should be difficult to recognise.
If it still smells sour, feels hot, or contains lots of fresh waste, let it mature further.
Consider the Nutrient Needs of the Next Crop
The next crop should influence how you prepare the bed.
Leafy vegetables, chillies, cucumbers, beans, and brinjal do not all have identical nutrient demands.
If the soil needs fertiliser, apply an appropriate product according to its label.
Do not automatically add a heavy fertiliser dose every time the bed is replanted.
Repeated unnecessary feeding can cause:
salt buildup,
nutrient imbalance,
and root damage.
Preparation should be crop-specific.
Rotation Should Influence the Next Crop
If the last crop was chilli, immediately planting tomato or brinjal means placing another member of the same plant family into the same soil.
That may increase the risk of repeating certain pest or disease problems.
Where practical, rotate to a different family.
For example:
chilli could be followed by bayam or beans,
cucumber could be followed by leafy vegetables,
or sawi could be followed by a non-brassica crop.
In a small garden, rotation does not need to be perfect.
Even basic rotation can help.
Check for Pest Carryover
Look around the bed carefully.
Inspect:
remaining mulch,
stakes,
trellises,
bed corners,
undersides of surviving leaves,
and nearby pots.
Some pests may remain even after the main crop is removed.
If you are about to plant a fresh crop into a bed that still contains an active pest population, the new plants may be attacked immediately.
Clean and manage the problem first.
Disease Needs Extra Attention
If the previous crop had serious disease symptoms, do not treat the bed as an ordinary reset.
Depending on the problem, you may need to:
remove more plant debris,
clean tools,
avoid susceptible crop families,
improve drainage,
clean supports,
or seek disease-specific guidance.
Some soil-borne pathogens can persist for long periods.
Simply adding compost and planting again does not automatically make the bed safe.
Plan the New Layout Before Planting
A freshly cleared bed looks deceptively large.
This is the moment gardeners often overcrowd.
Plan using mature plant size, not seedling size.
Mark where the large crops will go first.
Then decide whether smaller or temporary crops can fit between them.
For example, you may plant brinjal at appropriate spacing and temporarily grow quick leafy vegetables in the gaps.
Those temporary crops should be harvested before the brinjal becomes large.
Install Trellises Before Vines Go In
If the next crop includes:
cucumber,
long beans,
bitter gourd,
pumpkin,
or another climber,
prepare the support system first.
Installing trellises after vines begin sprawling usually creates unnecessary damage and tangling.
Check that the structure is strong enough to support mature, rain-soaked plants.
This is particularly important in Malaysia, where thunderstorms and heavy rain can place substantial weight on vines.
Check Irrigation
Before planting, inspect your watering system.
If you use drip irrigation:
flush clogged lines,
check emitters,
repair leaks,
and reposition tubing for the new layout.
If you water manually, check whether the bed has areas that dry faster than others.
A new crop cycle is a good time to correct uneven watering before plants make access difficult.
Plan for Rainy and Drier Conditions
Think about what the weather is likely to do during the next several weeks.
If conditions are very wet, prioritise:
excellent drainage,
airflow,
and avoiding unnecessary irrigation.
If conditions are hotter and drier, consider:
mulch,
deeper watering,
and reducing exposed soil.
Do not prepare the bed as though Malaysian weather stays identical all year.
Reuse Mulch Carefully
If the existing mulch is still clean and healthy, you may reuse it.
Remove mulch that is:
badly diseased,
heavily pest-infested,
or decomposing into an unpleasant wet layer.
During bed preparation, temporarily move the mulch aside.
Plant first.
Then return an appropriate layer once seedlings are established.
Keep mulch away from direct contact with vulnerable stems.
Level the Bed
Once amendments are added, rake the surface gently.
Fill low areas.
Avoid leaving deep depressions where rainwater may collect.
You want a reasonably level bed with a crumbly surface suitable for planting or sowing.
Do not compress it by walking on it.
Raised beds should ideally be narrow enough to reach from the sides.
Water Before Transplanting if Necessary
If the bed is dry, moisten it before planting.
Young transplants establish better when they move into evenly moist soil rather than dry, hot soil.
Do not turn the bed into mud.
The goal is a comfortably moist root zone.
For direct sowing, a fine, moist surface can also improve seed-soil contact.
Should You Wait Before Planting?
If you used mature compost and ordinary appropriate amendments, and the soil is healthy, you often do not need to wait long.
The next crop can usually be planted relatively soon.
Delay replanting if:
the soil is waterlogged,
unfinished organic material was added,
fertiliser may be excessive,
serious disease is unresolved,
or the bed requires major repair.
Wait until the actual problem is solved rather than following an arbitrary rest period.
Plant at the Right Time of Day
For transplants, early morning or late afternoon can reduce stress in hot Malaysian conditions.
Water the seedlings beforehand if needed.
Handle root balls carefully.
After planting, water appropriately and monitor the crop closely during the first few days.
The preparation work is only useful if the new plants establish successfully.
Keep Backup Seedlings
When practical, keep a few extra seedlings.
Some transplants may fail.
Heavy rain, pests, or unexpected heat may damage young plants.
A small backup supply allows you to replace failures quickly without waiting several more weeks.
Do not keep so many backups that they become overcrowded and weak.
Record What You Changed
Make a simple note in your garden journal.
For example:
Bed A — New Crop Cycle
Previous crop: chilli
Added: 3 cm mature compost
Drainage: good
Trellis: repaired
Next crop: long beans
Spacing: 20 cm along trellis
This becomes valuable later.
If the crop performs exceptionally well, you know how the bed was prepared.
If it performs poorly, you have information to investigate.
A Simple Raised-Bed Preparation Routine
Before every new crop cycle:
1. Remove the old crop.
2. Weed the bed.
3. Inspect the soil and roots.
4. Check drainage and compaction.
5. Add mature compost or nutrients where needed.
6. Consider crop rotation.
7. Plan mature plant spacing.
8. Install trellises or supports.
9. Check irrigation.
10. Replant once the bed is ready.
This process does not need to take weeks.
A healthy bed may be prepared and replanted very quickly.
The Goal Is Improvement, Not Just Repetition
Every crop cycle gives you information.
Maybe the last cucumber planting became too crowded.
Perhaps the soil stayed wet after rain.
Maybe the chilli spacing was perfect.
Perhaps one end of the bed dried twice as fast as the other.
Use that experience.
Preparing the next cycle should not simply restore the bed.
It should improve it.
At the end of the day, preparing a raised bed for a new crop cycle is about making sure the next plants inherit better conditions than the previous ones left behind. Clear exhausted crops, inspect soil and drainage, replenish organic matter and nutrients where genuinely needed, rotate plant families where practical, and plan the new layout before the seedlings go in. In a Malaysian home garden where the same raised bed may support several crops in one year, a careful reset between cycles helps keep the soil productive, the plants healthier, and every new planting more efficient than the last.
Getting a raised bed ready for its next crop? Tag @projectharvest.my on Instagram and show us the cleared bed, soil amendments, new layout, trellis setup, or the seedlings waiting to go in. We would love to see how Malaysian home gardeners turn one finished crop into the starting point for an even better growing cycle.