
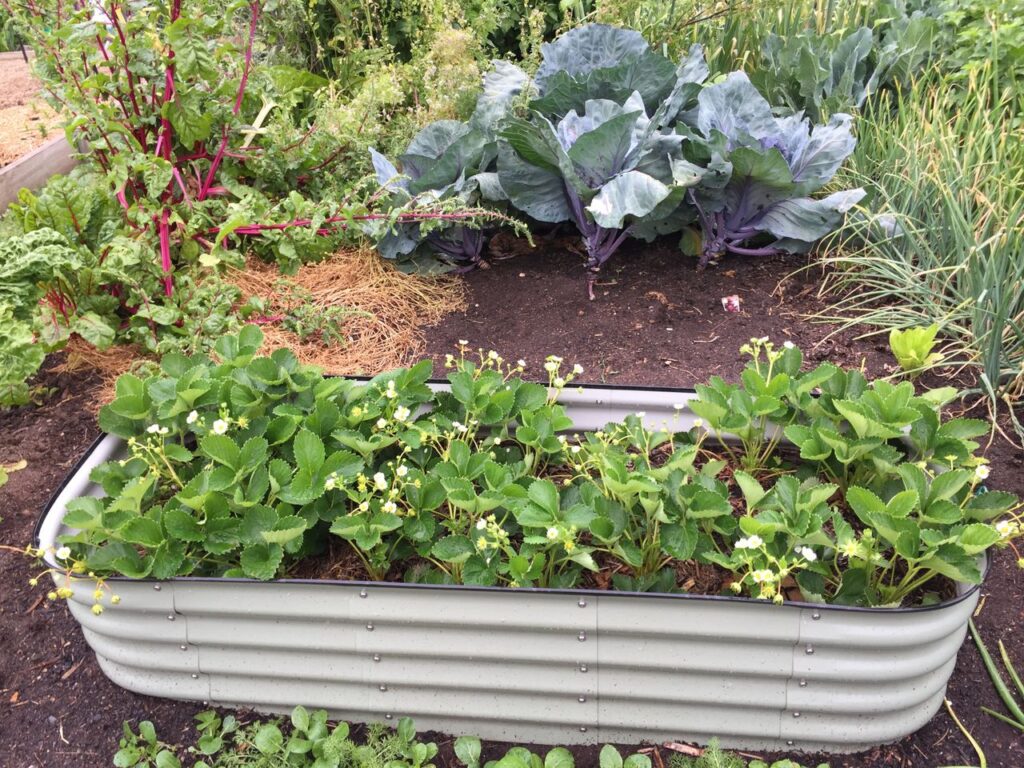
Resetting a garden bed means preparing the growing area after one crop finishes so the next crop begins with healthy soil, good drainage, appropriate fertility, and fewer leftover pest or disease problems.
You do not need to throw away all the soil or completely rebuild the bed every time.
In many cases, a simple reset involves:
removing the finished crop,
cleaning up problematic plant material,
checking the soil,
adding suitable organic matter,
correcting any compaction or drainage issues,
and planning what will grow there next.
For Malaysian home gardens where vegetables can be grown through much of the year, learning how to reset beds efficiently helps keep the garden productive without unnecessarily replacing soil after every harvest.
Start by Removing the Finished Crop
Once a vegetable plant has reached the end of its productive life, remove the main stems and root crown.
Healthy plant material may be composted if appropriate.
However, plants affected by serious or unidentified disease should be handled more carefully.
Do not automatically place heavily diseased material into a home compost pile, particularly if you are unsure whether your composting process reaches conditions capable of reducing the pathogen.
The safest approach may be to dispose of seriously diseased material separately according to local waste practices.
Should You Remove Every Root?
Not necessarily.
Small healthy roots left behind will eventually decompose and contribute organic material to the soil.
You do not need to spend an hour picking every fine root from the bed.
However, remove:
large root crowns,
thick woody roots that interfere with planting,
rotting roots,
and obviously diseased root material.
If the previous crop suffered from root rot or another suspected soil-borne disease, inspect the roots carefully before deciding what remains in the bed.
Remove Weeds Before Replanting
A crop change is an ideal opportunity to weed thoroughly.
Young weeds are much easier to remove before the next vegetables fill the bed.
Pay particular attention to perennial or spreading weeds that can regrow from roots or underground stems.
Do not simply bury mature weeds beneath new compost and assume they are gone.
If they are capable of regrowth, remove them properly.
Inspect the Soil Before Adding Anything
Do not automatically add fertiliser, compost, lime, and every available soil amendment simply because a crop has finished.
First, inspect what you already have.
Look at:
soil texture,
moisture,
drainage,
compaction,
organic matter,
and how well roots grew during the previous cycle.
Ask what actually needs improving.
A garden bed that performed well may need only a modest refresh.
A bed that became hard, waterlogged, or severely depleted may need more attention.
Check for Compaction
After repeated planting, watering, and heavy rain, the soil surface can become dense.
Press a hand tool into the bed.
If the soil is extremely hard and difficult to penetrate even when appropriately moist, some loosening may help.
You do not necessarily need to deeply dig the entire bed.
Gently loosen compacted areas with a garden fork or hand cultivator while avoiding unnecessary destruction of the soil structure.
For established no-dig systems, adding organic matter to the surface and minimising traffic on the bed can help maintain structure over time.
Never Walk on the Growing Area
One of the easiest ways to compact a raised bed is to step inside it.
Design beds narrow enough that you can reach the centre from the sides.
If you constantly need to stand on the soil to reach plants, the bed may be too wide for easy maintenance.
Use pathways for walking and keep the planting area for roots.
This makes every future crop reset easier.
Check Drainage Before the Next Crop
Drainage deserves special attention in Malaysia.
A bed that drains poorly during repeated tropical rain can quickly become a problem.
After the old crop comes out, look for:
persistently soggy areas,
water pooling,
bad smells,
dense soil,
or sections where previous roots rotted.
If water repeatedly collects in one area, adding fertiliser will not solve the problem.
You may need to improve the bed structure, unblock drainage, raise the soil level, or correct whatever is preventing excess water from escaping.
Check Whether the Soil Level Has Dropped
Organic materials gradually decompose.
Over time, the soil level in a raised bed may sink.
This is normal.
If the bed has settled significantly, top it up with suitable growing material rather than waiting until plants are growing in an increasingly shallow layer.
Use appropriate soil or growing mix rather than filling the entire bed with unfinished compost or fresh organic waste.
The root zone needs a stable, well-drained growing medium.
Add Mature Compost Where Needed
Mature compost is one of the most useful materials for refreshing a bed.
It can add organic matter and improve the soil’s ability to hold water and nutrients while supporting better structure.
For many established garden beds, a surface layer of roughly 2 to 5 cm of mature compost can be a practical starting point between crop cycles, depending on the existing soil and crop demands.
You do not need to bury huge quantities deeply.
Compost can be lightly incorporated into the upper soil or used as a surface amendment, depending on your gardening system.
More compost is not automatically better.
Make Sure Compost Is Actually Finished
Do not plant directly into large quantities of hot, unfinished compost.
Finished compost should generally be:
dark,
crumbly,
earthy-smelling,
and no longer heating strongly.
Most original ingredients should be difficult to recognise.
Unfinished compost can continue decomposing aggressively and may temporarily affect nutrient availability or create unsuitable root-zone conditions.
If you are unsure, allow it to mature further before using large quantities around new seedlings.
Do You Need Fertiliser During Every Reset?
Not automatically.
The next crop may need additional nutrients, but fertiliser should be based on crop requirements and soil condition.
A heavy-feeding fruiting crop may require a different programme from a short leafy vegetable crop.
If you use granular, slow-release, or other fertilisers, follow the labelled application rate.
Do not repeatedly add fertiliser every time a crop finishes without considering what is already present.
Excess fertiliser can contribute to salt buildup and nutrient imbalance.
Crop History Should Influence the Next Planting
Before choosing what goes into the refreshed bed, remember what grew there previously.
If the bed contained chillies, replacing them immediately with tomatoes or brinjal gives you another crop from the same plant family.
If possible, rotate to something unrelated.
For example:
chilli could be followed by beans or leafy vegetables,
cucumber could be followed by bayam,
or a brassica crop such as sawi could be followed by a non-brassica crop.
Crop rotation does not need to be perfect in a small garden, but avoiding repeated plant families can help reduce recurring problems.
Look for Pest Carryover
Check underneath old leaves, mulch, bed edges, stakes, and trellises.
Some pests may remain around the bed after the main crop is removed.
Remove heavily infested plant debris.
Clean reusable supports when appropriate.
Sticky traps or other monitoring tools should also be inspected and replaced when necessary.
Resetting the bed while leaving an obvious pest population untouched means the next crop may be attacked almost immediately.
Disease Requires a Different Kind of Reset
If the previous crop was healthy, a routine soil refresh may be enough.
If the bed suffered from a serious disease, be more cautious.
Depending on the problem, you may need to:
remove infected roots and debris,
clean tools,
avoid planting susceptible relatives,
improve drainage,
clean stakes or supports,
or obtain disease-specific guidance.
Some soil-borne pathogens can remain in soil for long periods.
Adding compost and planting again does not automatically eliminate them.
If you do not know what caused a serious crop failure, investigate before planting another valuable crop into the same conditions.
Check the Old Mulch
Mulch does not automatically need to be removed.
If it remains clean and in good condition, it may continue protecting the soil.
However, remove mulch that has become:
heavily contaminated with diseased plant material,
badly decomposed into an unpleasant anaerobic layer,
or infested with pests that require management.
During very wet Malaysian periods, also check that thick mulch is not keeping the soil excessively wet.
You can replace or adjust it after the next crop is established.
Level the Bed
After adding compost or amendments, rake the surface gently.
Break up very large clods.
Fill obvious depressions.
Create a relatively even planting surface.
This helps prevent irrigation or rainwater from collecting in low spots.
Do not pulverise healthy soil into fine dust.
You want a structured, crumbly root zone rather than a powdery surface that may crust after heavy rain.
Should You Leave the Bed Empty for a While?
Not always.
A healthy bed with no major disease problem can often be replanted relatively quickly once it has been cleaned and prepared.
There is no universal rule saying soil must “rest” for weeks between vegetable crops.
In Malaysia’s climate, leaving a productive bed empty unnecessarily may simply create space for weeds.
However, there are situations where delaying planting can make sense — for example, when you are dealing with disease, severe soil problems, unfinished compost, or major bed repairs.
Resting should have a reason.
Water the Bed Before Planting
If the soil is very dry after preparation, water it appropriately before transplanting or sowing.
This helps create an evenly moist environment for new roots.
For direct-sown seeds, avoid saturating the bed so heavily that the surface becomes muddy or crusted.
For transplants, moist soil reduces the stress of moving into a completely dry root zone.
Plan Spacing Before the Seedlings Go In
A freshly cleared bed looks enormous.
This is when overcrowding usually begins.
Gardeners see empty soil and think:
“I can fit another chilli here.”
Remember the mature size of the next crop.
Mark spacing before planting if necessary.
If you plan to intercrop quick vegetables between slower crops, decide in advance when those temporary crops must be removed.
A successful bed reset should improve the next layout, not recreate the same overcrowding problem.
Prepare Trellises Before Planting Climbers
If the next crop is cucumber, beans, bitter gourd, or another climber, install or check the trellis during the reset.
It is much easier to repair supports while the bed is empty.
Make sure the structure can support mature vines, particularly during Malaysian thunderstorms when wet foliage can become very heavy.
Do not wait until the vines are already tangled before fixing the support.
Keep Notes on What You Changed
Add a short entry to your garden journal.
For example:
Bed A — 15 October
Old crop: cucumber
Removed old vines and roots
Added approximately 3 cm mature compost
Drainage good
Next crop: long beans
This creates useful soil and crop history.
If Bed A performs exceptionally well or badly later, you know what happened during the reset.
A Simple Garden Bed Reset Routine
When a crop finishes, follow this order:
1. Remove the old crop.
Take out major stems, roots, and unhealthy material.
2. Weed the bed.
Clear unwanted competition before the next crop begins.
3. Inspect soil and drainage.
Look for compaction, waterlogging, sinking soil, or other problems.
4. Check for pests and disease.
Do not carry an unresolved problem directly into the next crop.
5. Add mature compost or other amendments if needed.
Refresh rather than automatically overloading the soil.
6. Plan the next crop.
Consider rotation, mature spacing, and household needs.
7. Prepare supports.
Repair trellises, stakes, irrigation, and bed edges.
8. Replant when conditions are suitable.
A healthy bed usually does not need to sit empty without reason.
Resetting Is Also a Chance to Improve the Garden
Every crop teaches you something about the bed.
Perhaps it dried too quickly.
Perhaps the centre became compacted.
Maybe the cucumber shaded everything.
Maybe the soil stayed too wet during heavy rain.
Use the reset to correct those problems.
You might:
increase mulch,
change plant spacing,
improve drainage,
move the trellis,
alter irrigation,
or choose a different crop.
The goal is not simply to restore the bed to how it was.
It is to make the next cycle better.
At the end of the day, resetting a garden bed between crops is about giving the next planting a clean and healthy starting point without unnecessarily throwing away good soil. Remove exhausted plants, inspect for pests and disease, correct drainage and compaction, replenish organic matter where needed, and choose the next crop with rotation and mature spacing in mind. In a Malaysian home garden where one raised bed may support several crop cycles in a year, these few steps between harvest and replanting can make a major difference to long-term soil health and productivity.
Just cleared a raised bed and getting it ready for its next crop? Tag @projectharvest.my on Instagram and show us your before-and-after reset, what you added to the soil, what problem you corrected, or what you are planting next. We would love to see how Malaysian home gardeners turn the end of one harvest into a better starting point for the next.