
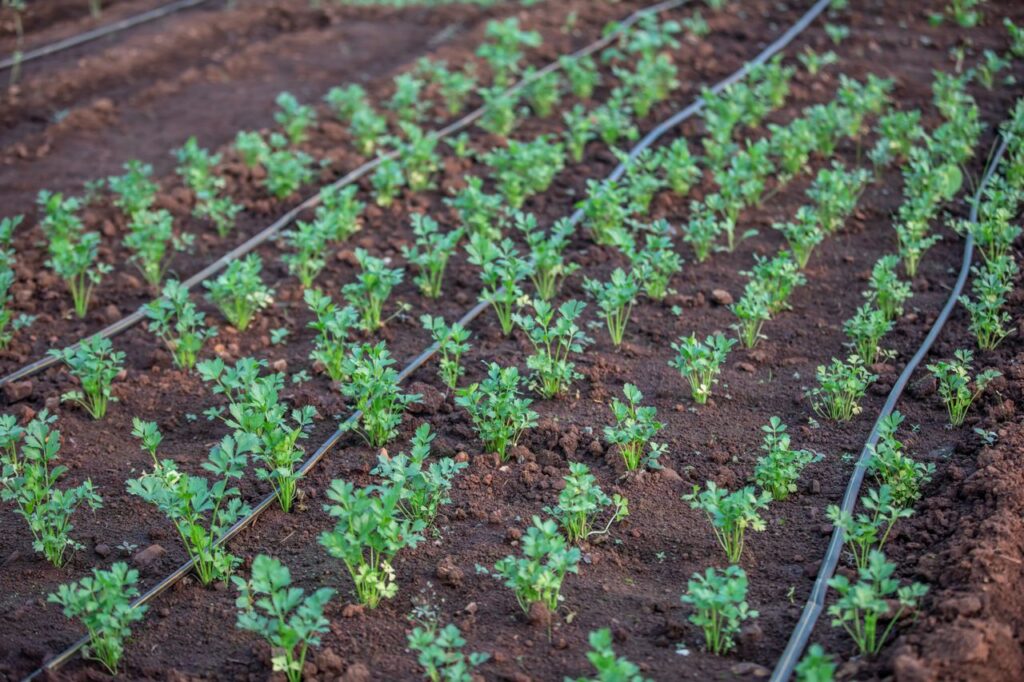
A simple drip irrigation system can make watering a home garden much easier, especially if you have several pots, raised beds, or vegetables that need regular moisture during Malaysia’s hotter periods.
Instead of spraying the whole garden with a hose, drip irrigation delivers water slowly near the root zone of each plant. That means less water is lost to evaporation, pathways stay drier, and you can water several plants at the same time without standing outside holding a hose.
The basic system is surprisingly simple: a water source, tubing, connectors, and small outlets called emitters that release water gradually.
The key is designing it around your actual garden rather than buying a complicated irrigation kit and hoping everything fits.
How Does Drip Irrigation Work?
A drip system carries water through a main tube and releases it through small emitters positioned near plants.
Depending on the setup, an emitter might release a slow drip beside one chilli plant, while a length of dripline contains several outlets that water an entire raised bed.
Unlike overhead sprinklers, drip irrigation focuses water closer to the soil.
That makes it particularly useful for vegetables such as chillies, tomatoes, brinjal, cucumbers, okra, herbs, and fruit plants grown in containers.
However, drip irrigation is not automatically efficient just because it uses small tubes. If it runs for too long, leaks, or places water in the wrong location, you can still waste water or overwater plants.
What Do You Need?
For a basic home system, you will usually need:
a tap or other suitable water source,
a main irrigation tube,
smaller distribution tubing if required,
connectors and tees,
drip emitters or dripline,
end caps,
stakes or clips,
and ideally a filter.
Depending on your water pressure, you may also need a pressure regulator.
A timer is optional, but it becomes very useful once you want watering to happen automatically.
You do not need to build the most advanced setup on day one.
A small system serving one raised bed and a few pots is a good place to learn.
Plan the Garden Before Cutting Tubing
Before buying or cutting anything, draw a simple layout.
Mark where the water tap is located.
Then mark your garden beds, pots, fruit trees, and other plants.
Try to create one clear main line that passes reasonably close to the areas requiring water.
From that main line, smaller tubes can branch towards individual containers or groups of plants.
This planning step prevents one of the most common beginner mistakes: creating a tangled network of tubes that becomes difficult to maintain later.
Keep the system as simple as the garden allows.
Start with the Water Source
Most Malaysian home gardeners will connect a small drip system to an outdoor tap.
The connection may include a tap adaptor, filter, and pressure regulator before the main tubing begins.
A filter is important because the holes inside drip emitters are small.
Sediment, rust particles, or debris can eventually block them.
If you are using stored rainwater, filtration becomes even more important because tanks and containers can contain fine organic material.
Why Water Pressure Matters
Household water pressure can sometimes be higher than a simple drip-irrigation system needs.
Too much pressure can cause fittings to separate, tubing to leak, or emitters to release water unevenly.
A pressure regulator reduces incoming pressure to a range suitable for the irrigation components.
Not every small garden system will require the same regulator because equipment specifications differ.
Follow the pressure recommendations supplied by the irrigation manufacturer rather than guessing.
If emitters near the tap are spraying aggressively while those at the end barely drip, pressure and system design may need attention.
Lay the Main Tube
Run the main irrigation tube along the edge of the growing area.
Avoid placing it where people regularly walk or where vehicles, doors, or gardening equipment may damage it.
Use stakes or clips to keep the line in position.
In raised beds, you can run the main tube along one side and connect smaller lines into the bed.
For rows of vegetables, dripline can run parallel to the crop rows.
For pots, small distribution tubing can branch from the main line towards each container.
Adding Emitters to Pots
For container plants, position an emitter close enough to wet the active root zone but not directly against the stem.
A newly transplanted chilli with a small root system may need the emitter fairly close to the plant.
As the plant matures and roots spread through a larger container, the watering point may need to move slightly outward.
Very large pots may benefit from two or more emitters positioned on different sides so the entire root zone receives water evenly.
One emitter dripping into a corner of a 60-litre container may leave much of the growing medium dry.
Dripline Works Well in Raised Beds
For raised vegetable beds, tubing with built-in emitters can be easier than installing a separate dripper beside every plant.
Run parallel lines through the bed so the wet zones overlap sufficiently.
The ideal spacing depends on the emitter spacing, soil texture, and crop arrangement.
Water spreads differently through sandy and clay-heavy soil.
In sandy soil, water tends to move downward quickly and may not spread as far sideways.
In heavier soil, moisture tends to spread sideways more before draining downward.
This means the same irrigation layout will not behave identically in every Malaysian garden.
Test Before You Bury or Mulch Anything
Once the tubing and emitters are connected, turn on the water before covering the system.
Walk through the entire garden.
Check every connection.
Look for leaks.
Make sure emitters are actually dripping.
Check the final emitter at the far end of the system.
Then inspect how water spreads into the soil.
This is important because an emitter can look like it is working perfectly while only wetting a tiny patch of soil.
Let the system run for a while, then dig gently beside the wet zone to see how deeply and widely the moisture has travelled.
How Long Should Drip Irrigation Run?
There is no universal answer such as “run your system for 15 minutes every morning.”
Watering time depends on:
the flow rate of your emitters,
pot size,
soil or potting mix,
plant size,
weather,
sun exposure,
and whether it has recently rained.
An emitter rated at two litres per hour delivers a very different amount of water from one rated at eight litres per hour.
Instead of choosing a watering time first, find out how much water your system actually delivers.
Then check the soil after irrigation.
The goal is to wet the root zone properly without leaving it permanently saturated.
Malaysia’s Rain Means Automation Still Needs Supervision
Automatic irrigation can be extremely convenient, but Malaysia’s tropical weather means a fixed timer should not simply run every day regardless of conditions.
A week of hot, dry weather may justify regular irrigation.
A week of thunderstorms may not.
If the soil is already wet from overnight rain and your timer adds another full watering cycle the next morning, root zones may remain unnecessarily saturated.
Adjust your timer during rainy periods or use a suitable rain sensor or soil-moisture-based controller if you want greater automation.
Technology should support observation, not replace it.
Water in the Morning When Practical
Morning is generally a convenient time to irrigate.
Temperatures are usually lower, evaporation is reduced compared with the middle of the day, and plants begin the hotter part of the day with access to moisture.
Because drip irrigation delivers water directly to the soil rather than soaking the entire canopy, leaf-wetness concerns are lower than with overhead sprinklers.
Still, watering according to soil need matters more than following one perfect clock time.
If the root zone is already moist, you do not need to irrigate simply because it is 7 a.m.
Group Plants with Similar Water Needs
One of the smartest ways to design a drip system is to create watering zones.
Do not automatically connect every plant in the property to one schedule.
A large fruit tree, chilli plant, pandan, mint, cactus, and tray of seedlings may all have very different moisture requirements.
If possible, group plants with similar needs onto the same irrigation line or use emitters with different flow rates where appropriate.
This prevents you from drowning drought-tolerant plants simply because thirsty vegetables need more water.
Watch for Blocked Emitters
Drip systems require basic maintenance.
If one plant begins wilting while everything around it looks healthy, check the emitter before assuming the plant has a disease.
Tiny outlets can become blocked.
Inspect the system periodically and clean or replace clogged emitters according to the manufacturer’s instructions.
Flush the lines occasionally by opening the end caps and allowing water to run through.
This helps remove accumulated sediment.
Filters should also be checked and cleaned regularly.
Keep Tubing Out of Extreme Heat Where Possible
Black irrigation tubing is made for outdoor use, but exposed lines can become very warm under Malaysian afternoon sun.
Where practical, route tubing through shaded areas or beneath a suitable mulch layer.
Do not bury fittings so deeply that you cannot find them when something leaks.
Keeping the lines protected but accessible makes maintenance easier.
Drip Irrigation Does Not Fix Bad Soil
A drip system can deliver water efficiently, but it cannot compensate for a root zone that drains poorly.
If a pot has blocked drainage holes or a garden bed remains waterlogged after rain, adding drip irrigation may make the situation worse.
Likewise, hydrophobic potting mix may initially cause drip water to follow narrow channels instead of spreading evenly.
Make sure the soil or growing medium can actually receive and distribute water properly.
Irrigation and soil management have to work together.
Start Small and Expand Later
You do not need to automate the entire property immediately.
Begin with the plants that consume the most watering time.
Perhaps that is one raised vegetable bed and ten chilli pots.
Install a small line.
Observe it for a few weeks.
Learn how long it takes to wet the root zone and how frequently the emitters need cleaning.
Once you understand how the system behaves, expanding it becomes much easier.
A simple system that you understand is better than a complicated one you cannot troubleshoot.
A Basic Setup for a Malaysian Home Garden
For a small terrace-house edible garden, a practical system might look like this:
An outdoor tap connects to a filter and suitable pressure regulator.
A main tube runs alongside the garden.
Smaller tubes branch into individual chilli, brinjal, tomato, curry leaf, or herb pots.
A separate section of dripline runs through the raised vegetable bed.
A timer controls watering when needed, but the schedule is adjusted according to rainfall.
The entire system can be expanded later as the garden grows.
That is enough to remove much of the repetitive daily watering without turning the garden into an engineering project.
At the end of the day, a good drip irrigation system is not about installing the most tubing or buying the smartest controller. It is about delivering the right amount of water slowly, consistently, and close to the roots. Start with a simple layout, use suitable pressure and filtration, position emitters where roots can actually use the water, and test the soil rather than trusting the timer blindly. In Malaysia’s mix of intense heat and sudden heavy rain, the best irrigation system is one that can be adjusted as quickly as the weather changes.
Built a simple drip system for your pots or vegetable beds? Tag @projectharvest.my on Instagram and show us your tubing layout, emitters, timer setup, raised-bed irrigation, or the watering problem you managed to solve. Your DIY setup could inspire another Malaysian gardener to spend less time holding a hose and more time actually enjoying the garden.