
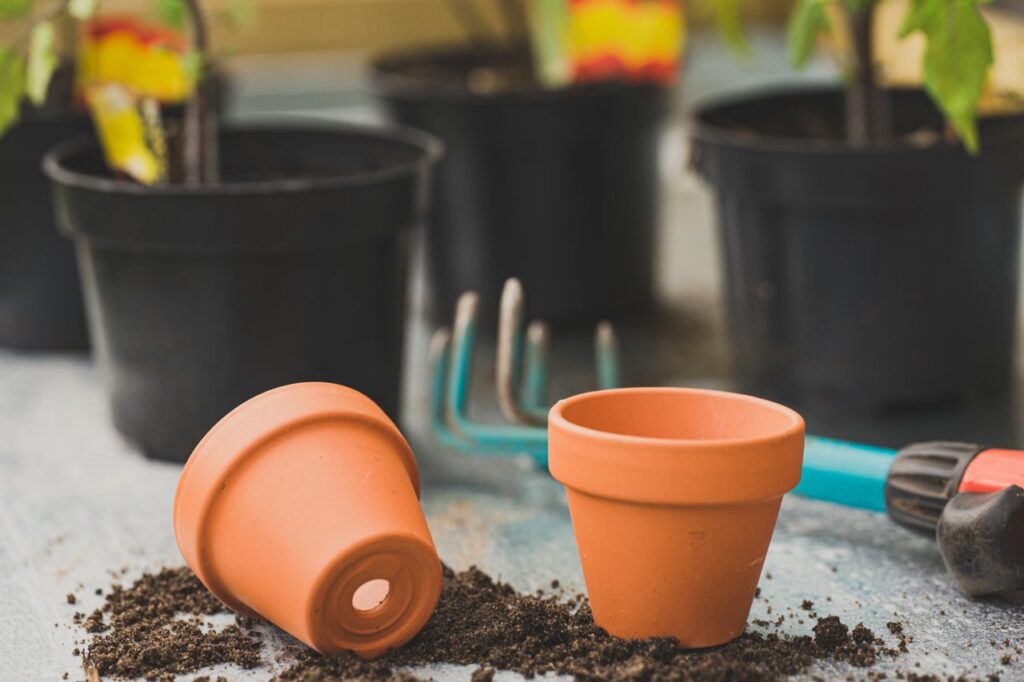
After a serious pest or disease outbreak, do not automatically place a new plant into the same pot without checking what may still be present.
The safest process is:
remove the old plant and growing medium, physically clean the pot, then sanitise it when the previous problem could survive on the container or in leftover organic material.
But not every outbreak requires aggressive disinfection.
A pot that previously contained a plant with a few thrips is different from one that held a plant with severe root disease.
Understanding that difference prevents unnecessary chemical use while reducing the risk of carrying problems into the next crop.
Cleaning and Sanitising Are Not the Same Thing
This distinction is important.
Cleaning means removing:
soil,
roots,
algae,
mineral deposits,
dead insects,
and other debris.
Sanitising or disinfecting means reducing potentially harmful microorganisms remaining on the cleaned surface.
You should generally clean first.
A disinfectant cannot work as effectively when the pot is still covered with:
soil,
compost,
or plant residue.
Think of it as:
remove the dirt first, then deal with what you cannot see.
Do You Need to Sanitise After Every Pest Problem?
No.
Many common pests live mainly on the plant rather than permanently inside the pot.
For example:
thrips,
whiteflies,
spider mites,
aphids,
and scale insects
are usually more closely associated with leaves, flowers, stems, and plant tissue.
If the outbreak was mild and the old growing medium is being replaced, thorough physical cleaning may sometimes be enough.
However, sanitising becomes more sensible when:
the infestation was severe,
pests or eggs may be hidden around pot rims and drainage holes,
the pot is being reused immediately,
or you are unsure what caused the plant decline.
Disease Outbreaks Deserve More Caution
A pot that held a plant with suspected:
root rot,
damping-off,
soil-borne fungal disease,
bacterial disease,
or another serious root-zone problem
should be treated more carefully.
Some disease-causing organisms can persist in:
soil particles,
plant roots,
organic debris,
or contaminated surfaces.
Reusing the container without cleaning it may expose the next plant to the same problem.
Start by Removing the Old Plant
Remove the entire plant, including as many roots as practical.
If the plant was severely diseased, avoid shaking contaminated soil all over:
nearby pots,
raised beds,
or healthy plants.
Work in an area where cleanup is easy.
For serious disease outbreaks, bagging the plant material before carrying it through the garden can reduce the amount of contaminated debris being spread around.
What Should You Do With the Old Potting Mix?
Do not automatically reuse old potting mix from a seriously diseased plant.
If the previous problem was clearly related to:
root rot,
damping-off,
unknown severe root disease,
or another suspected soil-borne pathogen,
the safest home-garden approach is usually to remove that growing medium from your active planting system.
Do not immediately mix it into:
seedling trays,
new vegetable pots,
or propagation media.
For minor above-ground pest problems, the potting mix itself may not necessarily be contaminated.
Judge the situation according to the actual problem.
Do Not Assume Composting Makes Everything Safe
Home compost piles vary enormously.
Many do not maintain sufficiently high temperatures throughout the whole pile for long enough to reliably destroy every plant pathogen or pest stage.
Do not assume that heavily diseased roots or contaminated potting mix become harmless simply because they enter a compost bin.
For serious or uncertain plant diseases, keeping contaminated material away from new crops is the more cautious approach.
Remove All Visible Debris
Once the pot is empty, remove:
old roots,
stuck soil,
algae,
dead leaves,
and crusted material.
Pay particular attention to:
drainage holes,
pot rims,
saucers,
and crevices.
Pests, eggs, and organic debris can remain hidden in these areas.
A stiff brush can be useful for sturdy pots.
For delicate pots, use something softer to avoid damaging the surface.
Wash the Pot Thoroughly
Use water and an ordinary cleaning agent suitable for washing the container.
Scrub all surfaces, including:
inside walls,
outside walls,
rims,
and the base.
The goal is physical removal.
Rinse away loosened material.
For many garden problems, this cleaning step alone removes a large amount of potential contamination.
Clean Saucers Too
Gardeners often clean the pot and forget the saucer.
But saucers can accumulate:
old soil,
algae,
fertiliser residue,
fallen leaves,
and pest material.
If the pot is being sanitised after a serious outbreak, clean the saucer at the same time.
The same applies to:
plant trays,
pot stands,
and reusable propagation containers.
What Can You Use to Sanitise Pots?
For pots that genuinely require disinfection, use a disinfectant suitable for the material and purpose.
Possible options may include products based on:
household bleach,
or other horticultural or household disinfectants whose labels permit use on hard surfaces.
Because bleach products vary in concentration, do not assume every bottle should be diluted using the same recipe.
Follow the product’s label for appropriate disinfection use and dilution.
Always prepare and use disinfectants in a well-ventilated area.
Never Mix Bleach With Other Cleaners
This is critical.
Never mix household bleach with:
ammonia,
vinegar,
acids,
or other cleaning products.
Dangerous gases can be produced.
Use one product at a time according to its label.
More chemicals do not make the pot cleaner.
Rinse When the Product Requires It
After the disinfectant has had the required contact time stated on the label, rinse the container if instructed.
Then allow it to:
drain,
dry,
and air thoroughly
before filling it with fresh growing medium.
Do not rush from chemical disinfection straight into planting if residue remains.
Plastic Pots Are Relatively Easy to Clean
Smooth plastic containers are generally straightforward because their surfaces are less porous than terracotta.
Pay particular attention to:
scratches,
drainage slots,
rims,
and decorative grooves.
Old roots can become tightly lodged in drainage holes.
Remove them before sanitising.
Terracotta Requires More Attention
Terracotta is porous.
Water and dissolved materials can enter tiny spaces within the pot.
This makes terracotta more difficult to clean thoroughly than smooth plastic.
Start by removing as much soil and root material as possible.
Scrub the surface well.
If the pot came from a serious disease situation, sanitise it using an appropriate method and allow it to dry thoroughly before reuse.
Do not assume a quick surface wipe has cleaned the internal pores.
What About Wooden Planters?
Wood is also porous and more difficult to sanitise completely.
If a wooden planter has held a severely diseased crop, consider:
how deeply contaminated material may have penetrated,
whether a liner was used,
and whether the structure can realistically be cleaned.
Sometimes replacing a cheap internal liner or removable component is easier than attempting to sterilise an entire wooden planter.
Fabric Grow Bags Are Different Again
Fabric pots can trap:
fine roots,
soil particles,
and organic matter
throughout the material.
Shake out loose media, remove roots, and wash according to the manufacturer’s instructions.
Allow the bag to dry thoroughly.
If the previous crop had a serious soil-borne disease, consider whether reuse is worth the risk, particularly for:
seedlings,
valuable plants,
or susceptible crops.
Do Not Forget Stakes and Trellises
If an infected plant was tied to:
stakes,
trellises,
clips,
plant cages,
or reusable ties,
those items may also need cleaning.
There is little benefit in sanitising the pot carefully and then returning the same dirty stake directly into the fresh growing medium.
Think about everything that contacted the plant.
Clean Your Tools
Pruners, scissors, trowels, and propagation tools can move plant material between crops.
This matters particularly when bacterial or certain viral diseases are suspected.
Remove visible debris and disinfect tools using a method appropriate for the tool and pathogen risk.
Do not move directly from a suspicious diseased plant to a healthy one with contaminated pruning blades.
Clean the Growing Area
If the plant was sitting on a balcony, shelf, or terrace floor, inspect that area too.
Remove:
fallen diseased leaves,
old potting mix,
dead roots,
and standing water.
Clean surfaces where practical.
This is particularly useful after outbreaks involving:
fungus gnats,
root disease,
or honeydew-producing pests.
Good sanitation should cover the immediate growing environment, not just the pot.
What About Ants, Scale, and Mealybugs?
Some pests can hide in:
pot rims,
drainage holes,
saucers,
and sheltered crevices.
Mealybugs in particular can sometimes occur around the root zone or hidden parts of containers.
If a heavily infested plant is removed, examine the empty pot carefully rather than assuming all pests left with the plant.
Physical cleaning becomes especially valuable here.
Fungus Gnats Require Attention to the Growing Medium
Adult fungus gnats may be visible around the pot, but their larvae live in moist organic growing media.
If a severe infestation occurred, replacing the old growing medium and correcting the moisture problem is often more important than obsessively disinfecting the container itself.
Otherwise, the new pot may simply recreate the same moist environment and the problem returns.
Sanitation works best when the underlying cause is also corrected.
Root Rot Is Not Just a “Dirty Pot” Problem
If a plant developed root rot, sanitising the pot is useful before reuse.
But ask why the rot developed.
Was the previous pot:
poorly drained?
constantly waterlogged?
too large for the plant?
filled with dense potting mix?
sitting in standing water?
If you clean the pot perfectly but recreate those same conditions, the next plant may suffer too.
Sanitation prevents carryover.
Good cultivation prevents recurrence.
Do You Need to Sterilise Everything?
No.
A home garden does not need to become an operating theatre.
Beneficial microorganisms exist throughout healthy soil and growing media.
The aim is not to eliminate all microbial life.
The goal is to reduce the chance of carrying a serious pest or pathogen directly from a problematic crop into the next one.
Use the level of sanitation appropriate for the risk.
When Simple Washing May Be Enough
A thorough wash may be reasonable when:
the previous plant was healthy,
the pot is only being reused routinely,
the problem was a mild above-ground pest infestation,
and no serious disease is suspected.
Sanitisation becomes more justified when:
a serious disease was present,
the root system was rotting,
seedlings suffered damping-off,
the cause of severe decline was uncertain,
or the pot is going to hold young vulnerable plants.
Seedling Pots Deserve Extra Care
Seedlings have small, sensitive root systems.
They are particularly vulnerable to damping-off and other early root problems.
For:
seed trays,
propagation cells,
and small nursery pots,
starting with clean containers and fresh growing medium is especially important.
A mature established plant may tolerate minor microbial pressure that a newly germinated seedling cannot.
Do Not Recontaminate the Clean Pot
After cleaning and sanitising, place the pot somewhere clean to dry.
Do not:
set it immediately into contaminated soil,
stack it inside dirty pots,
or refill it using tools still covered with old diseased growing medium.
A sanitation process only works if the container remains reasonably clean afterwards.
Use Fresh Growing Medium Where Disease Was Involved
For a serious soil-borne disease outbreak, combine the clean pot with fresh appropriate growing medium.
Do not sanitise the container and then refill it with the same contaminated potting mix.
That defeats the purpose.
Likewise, avoid mixing questionable old media into new seedling or propagation mixes.
A Practical Pot-Sanitation Routine
After a serious pest or disease problem:
1. Identify what probably caused the outbreak.
The level of sanitation should match the risk.
2. Remove the plant and old roots.
Avoid spreading diseased debris around healthy plants.
3. Decide whether the old growing medium should be reused.
Be cautious after serious soil-borne disease.
4. Scrape and brush away all visible material.
Pay attention to drainage holes and rims.
5. Wash the pot thoroughly.
Physical cleaning comes first.
6. Sanitise where the disease or pest risk justifies it.
Use an appropriate disinfectant according to the product label.
7. Never mix cleaning chemicals.
Especially bleach with acids or ammonia.
8. Rinse if required and let the pot dry.
9. Clean saucers, stakes, trays, and tools too.
10. Replant using clean growing medium and improved growing conditions.
Do Not Let Sanitation Replace Diagnosis
If every crop in the same area repeatedly develops the same problem, dirty pots may not be the main cause.
Investigate:
watering,
drainage,
pest reservoirs,
infected nursery plants,
soil quality,
airflow,
and disease spread.
Sanitation is one layer of prevention.
It is not a cure for a poorly functioning garden system.
Clean Pots Help Give the Next Crop a Fresh Start
Reusing containers is sensible.
There is no need to throw away every pot after a pest problem.
But reuse should be deliberate.
A container that has held a badly diseased plant deserves more attention than one that held a healthy crop.
Remove contamination first, sanitise when justified, and correct whatever conditions contributed to the original outbreak.
At the end of the day, sanitising pots after a pest or disease outbreak means removing old soil and plant debris first, then disinfecting the container when there is a realistic risk that pests or pathogens could carry over into the next crop. Malaysian home gardeners should pay particular attention to humid, wet growing areas, containers affected by root disease, reusable seedling trays, and crevices where pests can hide. There is no need to sterilise every pot after every insect sighting, but a careful reset after a serious outbreak can prevent the next plant from inheriting the previous plant’s problems.
Reusing pots after root rot, fungus gnats, scale, mealybugs, or another serious garden problem? Share how you cleaned the containers, what you changed before replanting, and whether the next crop stayed healthy by tagging @projectharvest.my on Instagram. Those real Malaysian garden resets can help other growers learn when a simple wash is enough — and when a more thorough sanitation job is worth the effort.